
What is Char Cloth, Why Do I Need it and How Do I Make it?
You may have heard of or seen this black, fragile piece of cloth in someone’s fire-making kit or overheard an old-timer talking about it, and wondered what this mysterious material is? Charcloth, or char paper is a man-made material that is most commonly used for primitive fire starting methods like flint & steel, ferro rods, solar magnifiers, etc. This material, when properly prepared, will ignite with the slightest spark and produce a slow burning, red-hot ember on its surface that can be used to light larger, more difficult to ignite tinder material such as grasses & twigs.

Basically charcloth is a lightweight, flexible version of charcoal; only rather than wood chunks it is made using a 100% organic fabric like cotton or hemp. The process to make it involves packing the fabric in an airtight metal container, then heating slowly and steadily over coals for a long period of time, allowing it to undergo a thermal decomposition process known as “pyrolysis” which turns organic matter into a low weight, high energy content, and very easily ignited material. The really cool thing about it is that you can easily make it yourself with very basic materials!
(If you're interested in in getting into primitive fire-making but don't want to start out make you're own, we offer a charcloth kit that comes with several rolls of cloth packed in a reusable metal tin.)
The Three Things You Will Need:
- Material: 100% cotton fabric. I normally use a heavy canvas duck material, but old T-shirts & denim jeans will do the job nicely. You just need to make sure they are 100% cotton! Anything containing polyester/acrylic will quickly turn into a hot mess.
- Container: A metal (steel) container with tight fitting lid. The preferred go-to for most people is an Altoids mint tin, but an old clean paint can (pint/quart) works great also. It just needs to be sturdy enough to hold up to heat.
- Fire: You’ve got lots of options here; you just need to be able to maintain a HOT fire for 15-30 minutes. A campfire, BBQ, propane/gas stove, sterno can are all workable options.
Making Char Cloth:
The process should only be performed outdoors in a well ventilated area as a fair amount of potentially unhealthy smoke/gases will be released.
- Begin by cutting your fabric into small strips or pieces. I prefer to start with 2-inch squares that will stack neatly in a rectangular tin and are a handy size to use. If you’re using a round can, you may want to cut into 2-inch wide strips and then rolling them into loose rolls that you can stack on end inside the canister.

- Next you will want to prepare your metal container. Using a small brad or nail, poke a single small hole in the lid of your container. The canister needs to be sealed enough to prevent oxygen from easily entering, but not so tight that the hot gasses can’t escape as it builds heat. Caution: If you don’t add this vent hole to relieve pressure, your lid will most likely blow off in spectacular fashion during the heating process, and scatter your project in all directions.

- Place your pieces into your metal container/tin. Lay them neatly in the tin to fill the space. You can pack it pretty full but just not too tightly. (The tin in the pic below has about 20 pieces in it.)

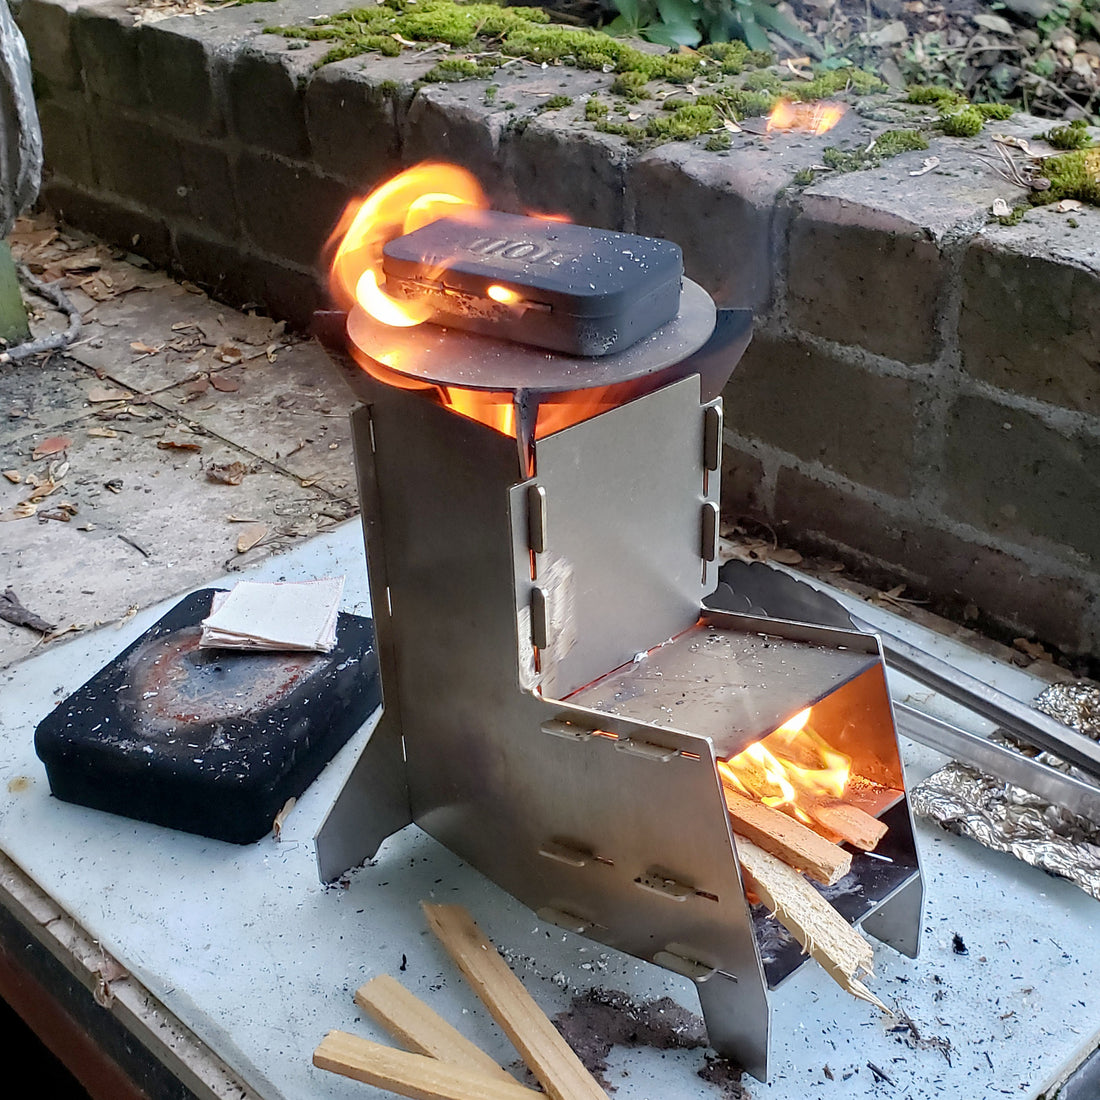
- Place the canister/tin over your fire. You need lots of heat so you’ll want it as close to, or directly on your heat source. Keep an eye on your container as you’re cooking it. After a few minutes you will begin to see smoke exiting the vent hole. As you continue to heat it, the smoke & gasses will become more aggressive and you might even see the gasses ignite into flame near the vent which honestly looks pretty cool. Eventually there will be no more smoke coming out of the vent which indicates that it’s about done. I’ve found that a small rectangular mint tin takes about 15-20 minutes but the time required will depend on several things such as your amount of heat, size of your container and quantity of material you’re making.

- Using a glove or tongs, remove your container from the heat source and place on a safe surface to cool. (Some people recommend placing a stopper over the vent hole to prevent air from getting back into the container but I haven’t found any need for this). It’s very important that you resist the urge to see your results, and that you let the tin cool down completely before you open the lid. If you open it up while it’s still hot, the rush of fresh oxygen will likely ignite the cloth, catching fire and ruining your project.

- Once the tin is cool, go ahead and open it up to inspect your work. What you want to see is a jet-black, fully charred cloth. If it’s super brittle/fragile and just falls apart, then you’ve likely cooked it too much. If some of the cotton is brown rather than deep black that means isn’t quite fully charred. In that case, just place it all back in the tin and repeat the process. After you’ve made a couple of batches you’ll start to get a feel for how much is just enough.

- After your cloth is cooled, I recommend that you place it in sealable zip-lock baggie or similar air-tight container to keep it dry and protected from moisture so that it’ll be ready to catch that first spark.

Please be aware that making charcloth isn’t rocket science, and there isn’t just one right way. There are literally endless tips, techniques and methods that could be applied which may all be valid, however the basic concept is always the same. The method I’ve outlined above has worked reliably for me over the years and is only intended as a basis for you to start with. Like any other skill you learn, take this knowledge and build upon it.
In our modern technology filled world it’s easy to take to ability to make fire for granted. Just grab a pack of matches or your Bic lighter and you’re good to go right? Our ancestors didn’t have this luxury and their lives literally depended on having the knowledge and skills to create fire using whatever primitive tools and materials they could acquire. We now call it Bushcraft but our ancestors just called it part of everyday life. Learning and understanding skills like primitive fire making are not only fun, but could be very useful in an unthinkable emergency situation.
![]()
1 comment
Thank you for sharing this I found it very interesting and am going to try it out